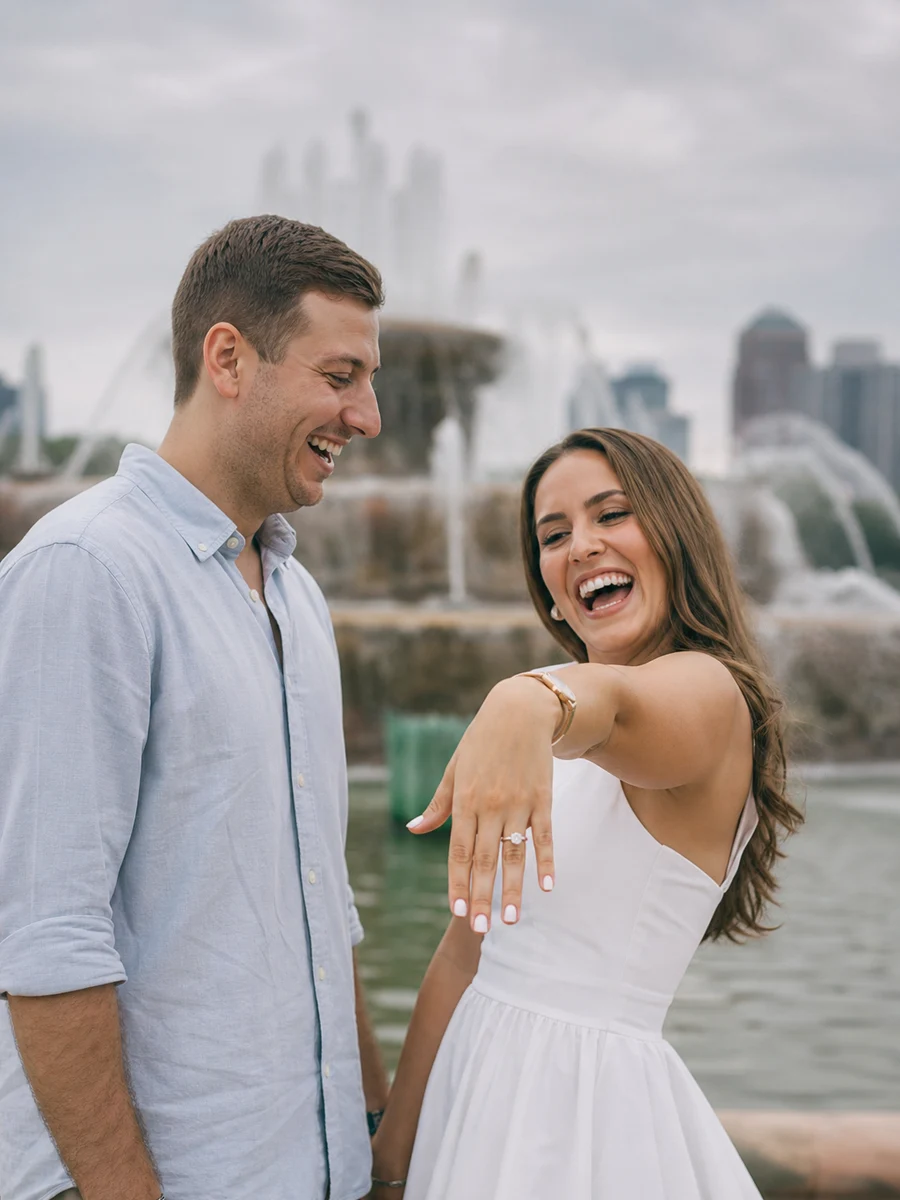
Playful Ring Reveal by the Fountain Engagement Photos
Don't be afraid to get a little splashy — the joy on your faces is all that matters in this sweet, playful moment.
📍 city💑 ring-reveal
Outfit Ideas

He
linen shirt
light blue
She
Don't be afraid to get a little splashy — the joy on your faces is all that matters in this sweet, playful moment.
He
linen shirt
light blue
She
white dress
white
You’re standing by the fountain as the sky shifts to a deep, velvety blue. The last sliver of sunset has vanished, and now the city lights flicker on one by one, their glow reflecting in the water’s surface. A faint mist touches your cheeks, and the sound of splashing blends with distant car horns and laughter. You’re in a crisp white dress; your partner’s soft pastel shirt provides a gentle contrast that pops against the urban backdrop.
Your photographer gestures. You extend your ring hand toward the lens, diamond catching the ambient light, then turn to your partner and let out a genuine laugh. The candid energy is immediate—shoulders relax, smiles widen. An overcast day earlier kept harsh glare at bay, so no one squinted, and now the even, diffused light lets the fountain’s details shine without blown-out highlights.
You move around the fountain, trying different angles. The water arcs and falls, a rhythmic white noise that calms any nerves. Passersby might glance, but you’re in your own little bubble. This is what city engagement photos feel like: alive, romantic, a little gritty. You’ll want to arrive 30 minutes before sunset to settle in, touch up makeup, and let your photographer dial in settings before the light peaks. Trust their timing—those 20 minutes of blue hour are fleeting, but they’re when your engagement photos will look magical, with the city as your glowing canvas.
When the shoot wraps, you’ll walk away with laughter still on your lips and the realization that the best images come from simply being in the moment.
🌆 Blue Hour — Shoot in the ~20 minutes after sunset when city lights glow against a deep blue sky.
Start by scouting on foot in neighborhoods you love, noting architectural details, murals, and fountains. Use Instagram geotags to see what backgrounds other photographers have captured, then visit at the same time of day to check light and crowds. Ask locals or your photographer for hidden gems—alleyways with string lights, rooftop bars, quiet plazas. Don't overlook transit stops like subway stations with art installations. The best spots often combine texture, depth, and a story that feels personal to you.
It depends on the location. Public sidewalks, parks, and plazas usually don't require permits for handheld photography, but many private properties, conservatories, and government landmarks do. Some cities require a permit for commercial shooting, even if it's just you and a photographer. Always check the venue's website or call ahead. For popular spots like rooftop decks or botanical gardens, a small fee often grants access and peace of mind. Your photographer will know the local regulations.
New York City offers iconic bridges, skyline views, and Central Park. San Francisco provides the Golden Gate Bridge, colorful Victorians, and coastal cliffs. Chicago blends lakefront beaches, urban architecture, and the Chicago Riverwalk. New Orleans delivers French Quarter balconies, oak-lined streets, and gas lamps. For desert modernism, try Palm Springs; for southern charm, Savannah. Pick a city that reflects your style—whether sleek and contemporary or historic and textured—and the backdrops will naturally complement your look.
You'll typically need permission from the building management or venue. Many rooftop bars, hotels, and observation decks offer photo passes for a fee, especially during off-peak hours. Book in advance, confirm hours, and ask about tripod restrictions or flash use. Arrive early to scout the best angles and ensure safety barriers are intact. Timing is crucial: sunset and blue hour are prime, but you'll want enough light to move around safely. Bring a jacket—wind can pick up at elevation—and consider a backup indoor spot in case of bad weather.
Scout the spot in person a few days before your shoot, ideally at the same time. Look for construction, seasonal changes, or new décor that might alter the backdrop. If you can't visit, do a video call with your photographer to assess current conditions. Always have a backup location within walking distance—maybe a nearby café with a charming storefront or a pocket park. Flexibility is key; sometimes an unexpected change leads to an even better composition that feels more authentic to your day.
Blue hour fades quickly, so you'll likely finish before full darkness, but safety is still a priority. Stick to well-lit, populated areas with open businesses nearby. Bring only essential gear, and keep phones and bags secured. If you're in a quieter district, move as a group and let someone know your plan. Avoid isolated alleys or deserted parks. Your photographer knows safe routes and can monitor the surroundings. Feeling safe keeps you relaxed, and that ease shows in your images.
Blue hour—the 20 minutes after sunset—is ideal for city scenes. The sky turns a deep indigo while streetlights, signs, and building windows glow warmly, creating balanced contrast. You avoid harsh midday shadows and squinting. Golden hour (just before sunset) works well for softer, dreamy light, but blue hour adds that cinematic urban feel. In early morning, you get quiet streets and sunrise hues. For fountains and reflective surfaces, blue hour is unbeatable because water catches both ambient and artificial light without blowing out.